
Last year, a former coworker challenged me to "ship something!" Around that time, I had been tinkering with MicroPython again, so I figured—why not experiment with the WebSerial API and talk directly to my micro controller?
Hello Webserial Console
Hello https://webserialconsole.com, the answer to my former coworker's challenge. Source code available under AGPL at https://github.com/androiddrew/webserial. This project was a lot of fun to build, and hopefully you'll find some utility in it too. Let's dive in to what this project is about, and what makes it tick.
What Does It Do?
Well, you know those Universal Asynchronous Receiver and Transmitters (UARTs) everyone is always talking about? It can talk to those, thanks to the magic of the Webserial API built into Chrome 89+, Edge, or Opera. We are not limited to UARTs either, an RS232 device connected to your PC will work too.
I am using a Pico2 in this walk through. This particular device has an onboard USB to UART bridge, allowing us to plug our device directly into the computer. If your micro controller lacks one of these, you can use an inexpensive USB to TTL adaptor and a bread board to connect to the serial GPIO pins directly. Expect to pay $5-15, but be sure the adapter you select is compatible with the logic level voltage of your micro controller. Typical values are 5V 3.3V 2.5V 1.8V. An Arduino for example uses 5V logic, while our Pico2 here is 3.3V.
Connecting Your Device
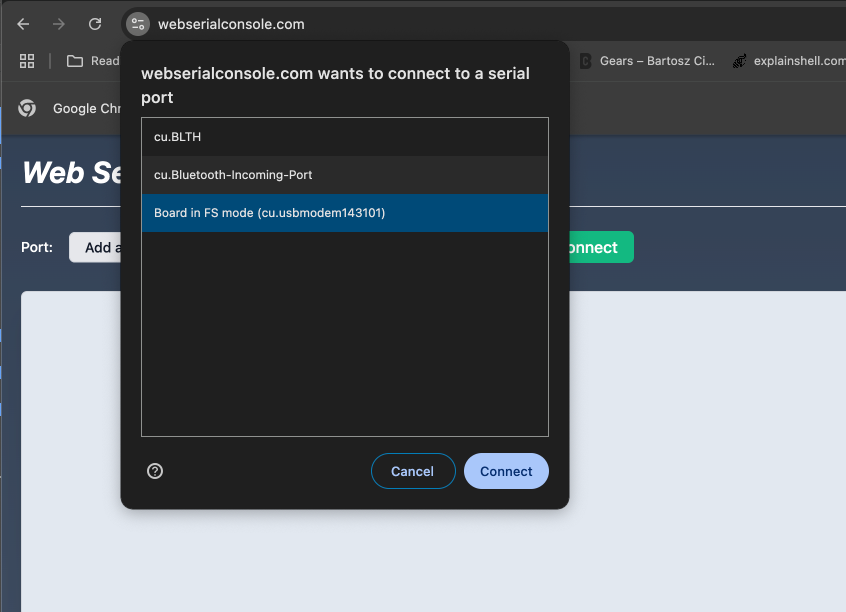
With your micro controller plugged into your PC, head over to https://webserialconsole.com/. The Chrome browser does not allow websites to access serial devices automatically, instead you must grant explicit permission to use a specific device. Devices are remembered across sessions, but device connections are not permanent. Refreshing the browser will close the active connection requiring you to reconnect. Since this is our first time, select the + button, which will open a list of available devices to connect to. My particular device is the Board in FS mode (cu.usbmodem143101).
After granting permission, the device is now available in the Port: dropdown menu. Serial devices can communicate at different baud rates. The Pico2 operates at 115200. Be sure to look up your own device's supported baud rates, select the correct Baud: value in the drop down, and then press connect.
Simple as that. Since this board is running MicroPython we aren't limited to just reading output, we have access to the REPL and can transmit from the browser to our board.
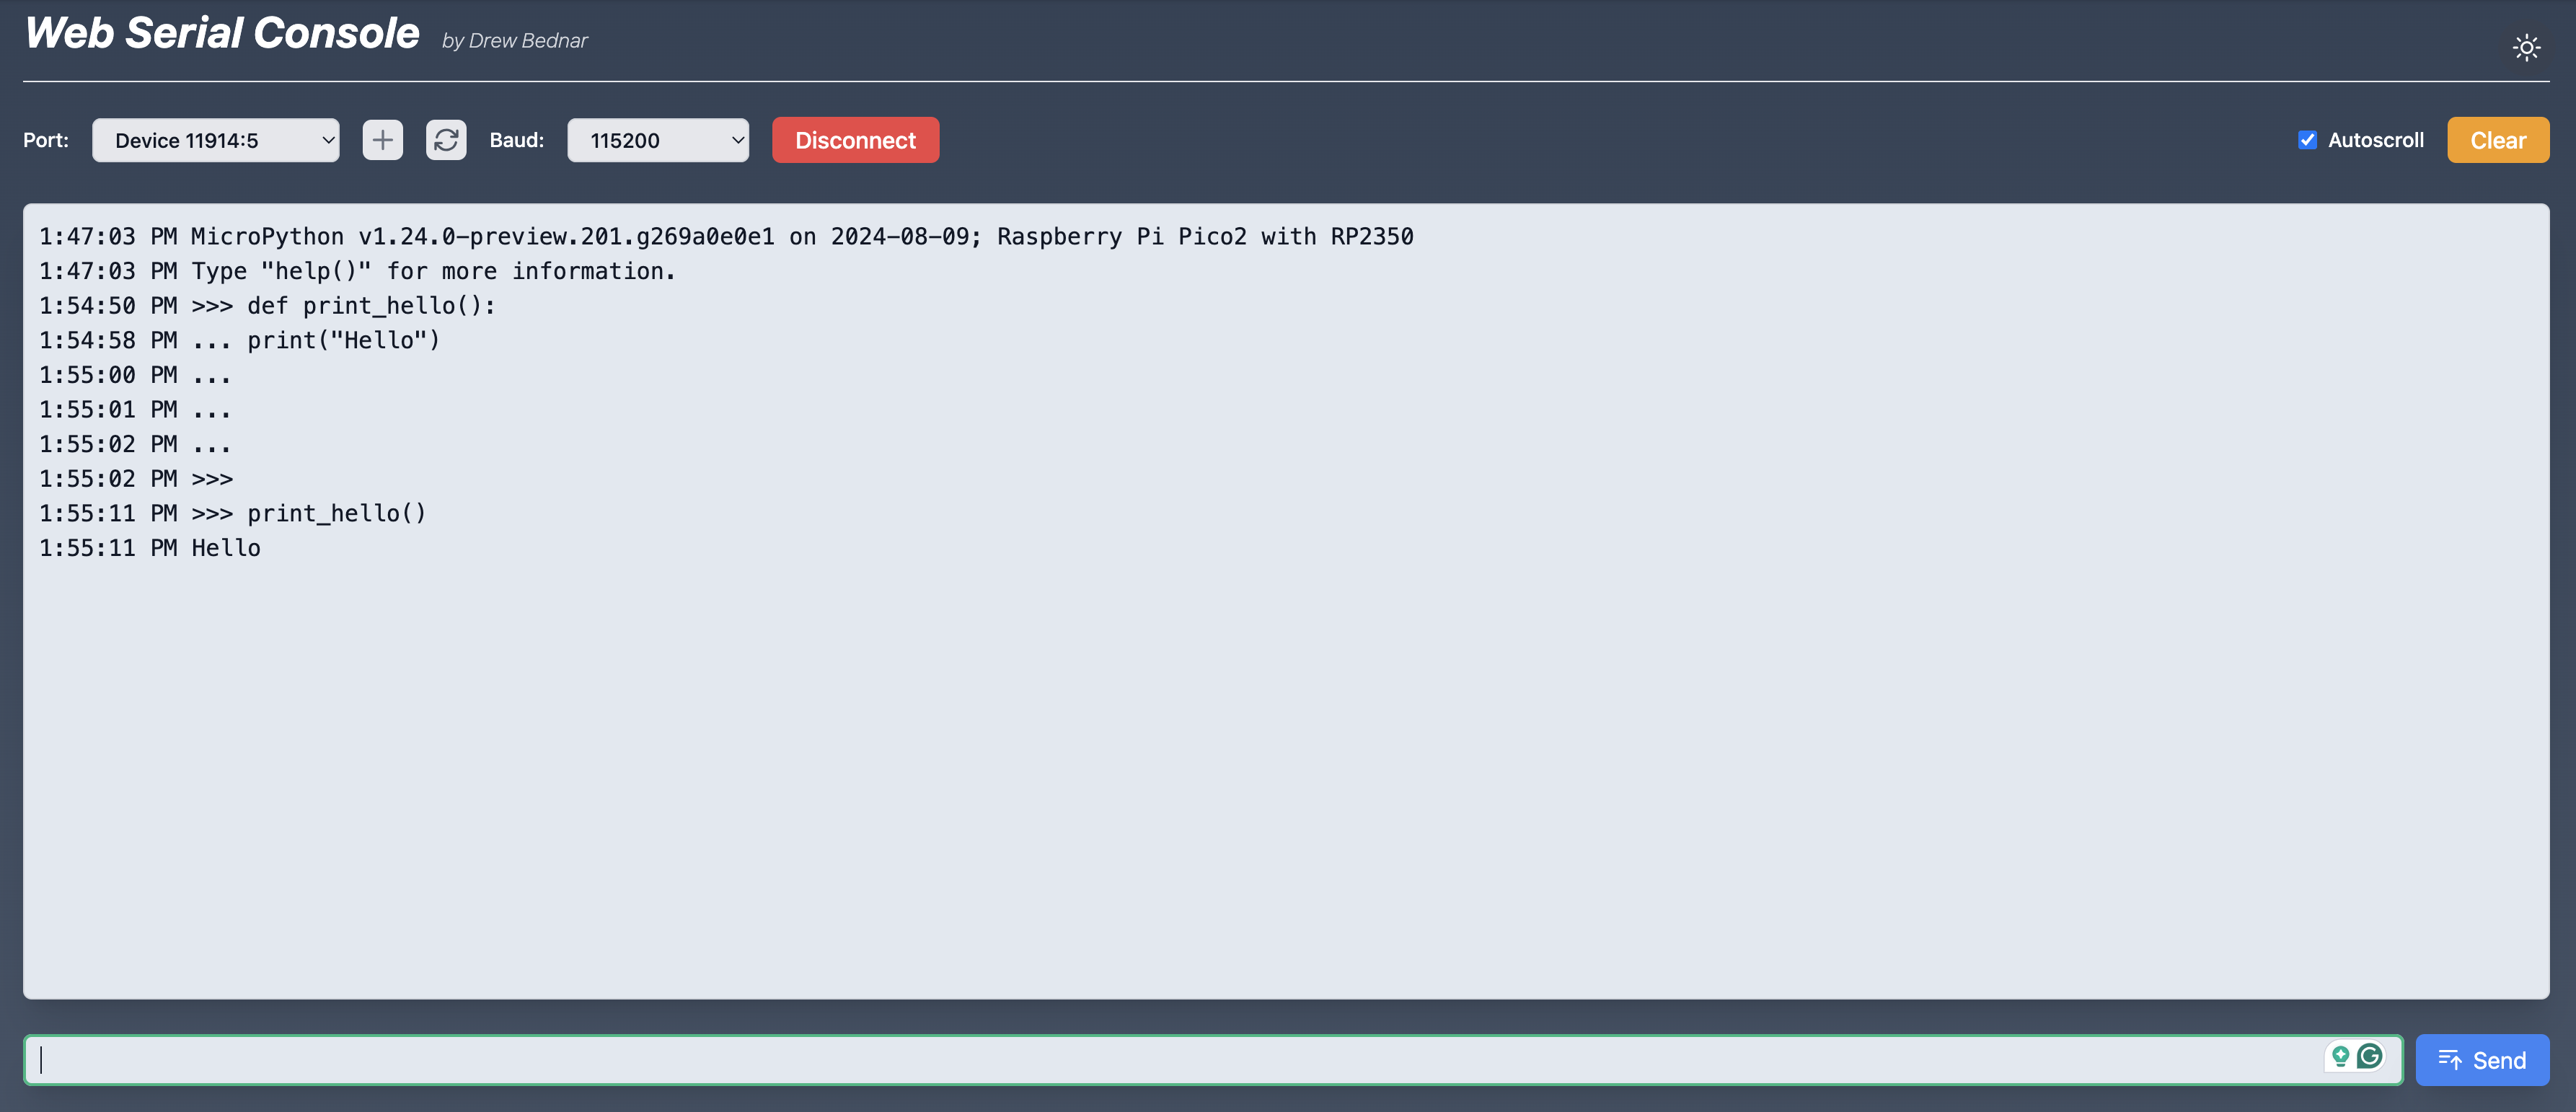
If our device was logging sensor data we would see the most recent values with Autoscroll checked. If we need to clear out the console, we have a Clear button. That's it in a nutshell. Refreshing the page will terminate the connection, or you can press the Disconnect button.
How Webserial Console Is Deployed
This application is a simple HTML, CSS, and Javascript app. No fancy framework. I did use Vite for builds and as a development server, but I could have easily avoided it. My home lab would have been suitable for hosting, but since this project's intent was to push my skills, I needed to step outside of my comfort zone and try a new deployment platform. I chose to host this on Cloudflare using the Pages service.
Overall I am going to give Cloudflare Pages a thumbs up. Since I purchased the domain name through Cloudflare's registrar I get free hosting and a Cloudflare managed TLS certificate out of the box. Deployments are also trivial. On push to main the Cloudflare worker just runs npm install && make build and deploys the output artifacts. On top of that, I get free page analytics, which has been incredibly motivating to see how many individuals are using my application.
Thank You and Enjoy
Thanks for taking the time and I hope you find this project useful.