The Standford Pupper
I subscribe to the most excellent news letter Weekly Robotics and issue #89 happened to feature a fascinating open source quadruped called the Pupper. Consider me smitten. A few months before I had purchased Modern Robotics, but couldn't relate the theory to the real world. This looked to be the perfect way to put things in practice.
Sourcing the materials
In my excitement I failed to notice that someone was selling kits in various states of completion. If I was doing it all over I would probably pay the little extra to save me both the time in sourcing the parts and shipping.
The project provides a google spreadsheet with the bill of materials. It is fairly well organized and I had to place orders with Amazon, McMasterCarr, JLCPCB, JX-Servo, and Great3D(for routed carbon fiber parts). Placing an order direct with JX-Servo was a little nerve wracking. I had to transfer, via PayPal, $450+ dollars to a Hotmail account. I know that is more than a little weird, but since PayPal has a decent dispute process I thought it was worth the risk. The sales team was extremely responsive and my order was sent direct from China arriving in Michigan in under seven days. JLCPCB was also just as quick. The "Plastic Spider" vendor on Great3D delivered his parts in 5 days from North Carolina. The Amazon sellers were actually the slowest, but this was also during the height of the covid crisis.
There are 12 parts that need to be 3d printed on an FDM Printer. I didn't notice this before, but the project provides a ZIP archive of all the .stl right in the BOM sheet. I just used the Fusion360 assembly to export the various body components to STL files for printing. The fact that the project has a Fusion 360 assembly is a very big windfall. I will definitely be modifying the body in the future to accommodate a camera, internal battery, and probably a Jetson carrier board. For now though I went ahead with all the specified parts.
All told I believe I spent:
| Item | Price with shipping |
|---|---|
| Battery | $31.79 |
| Battery Charger | $61.47 |
| Servo Horns | $75.09 |
| Pi and SD Card | $65.00 |
| Hardware | $207.14 |
| Servos | $352.00 |
| PCB | $35.25 |
| Carbon Fiber Parts | $103.00 |
| Total | $930.74 |
I am not including a PS4 controller, which I already had, but I did add in the Pi above even though I had a couple to spare. That is a little more expensive than advertised, but keep in mind I have enough hardware now to build about 5 more. If you are cost conscious and tolerant of long delivery times I think there are opportunities to get the servo horns for ~$30 from Banggood. Similar servos could probably be fudged for ~$150 - $200 from Ali-express, but your mileage may vary and it could impact the performance of the build.
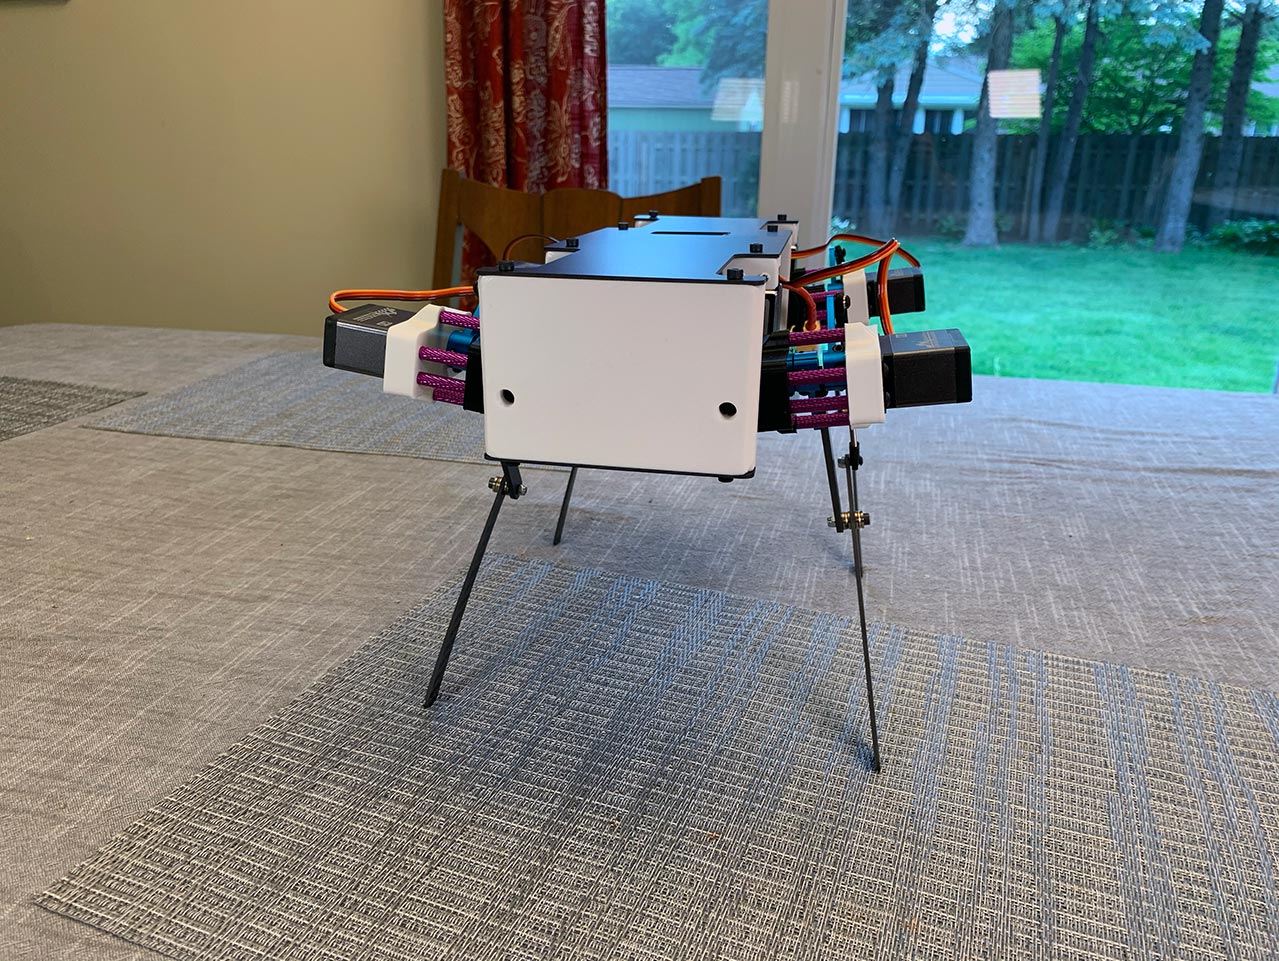
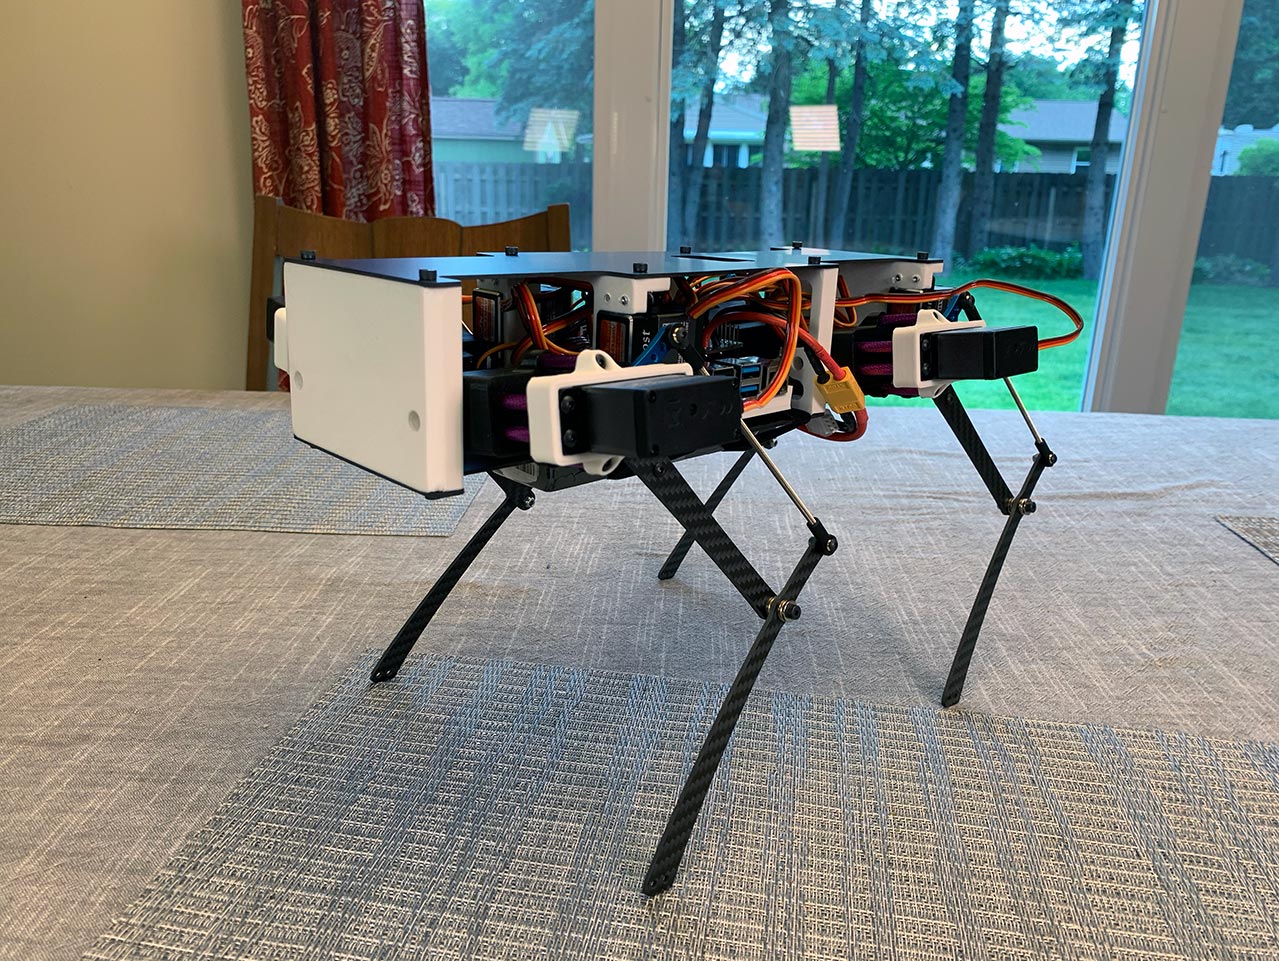
The Build
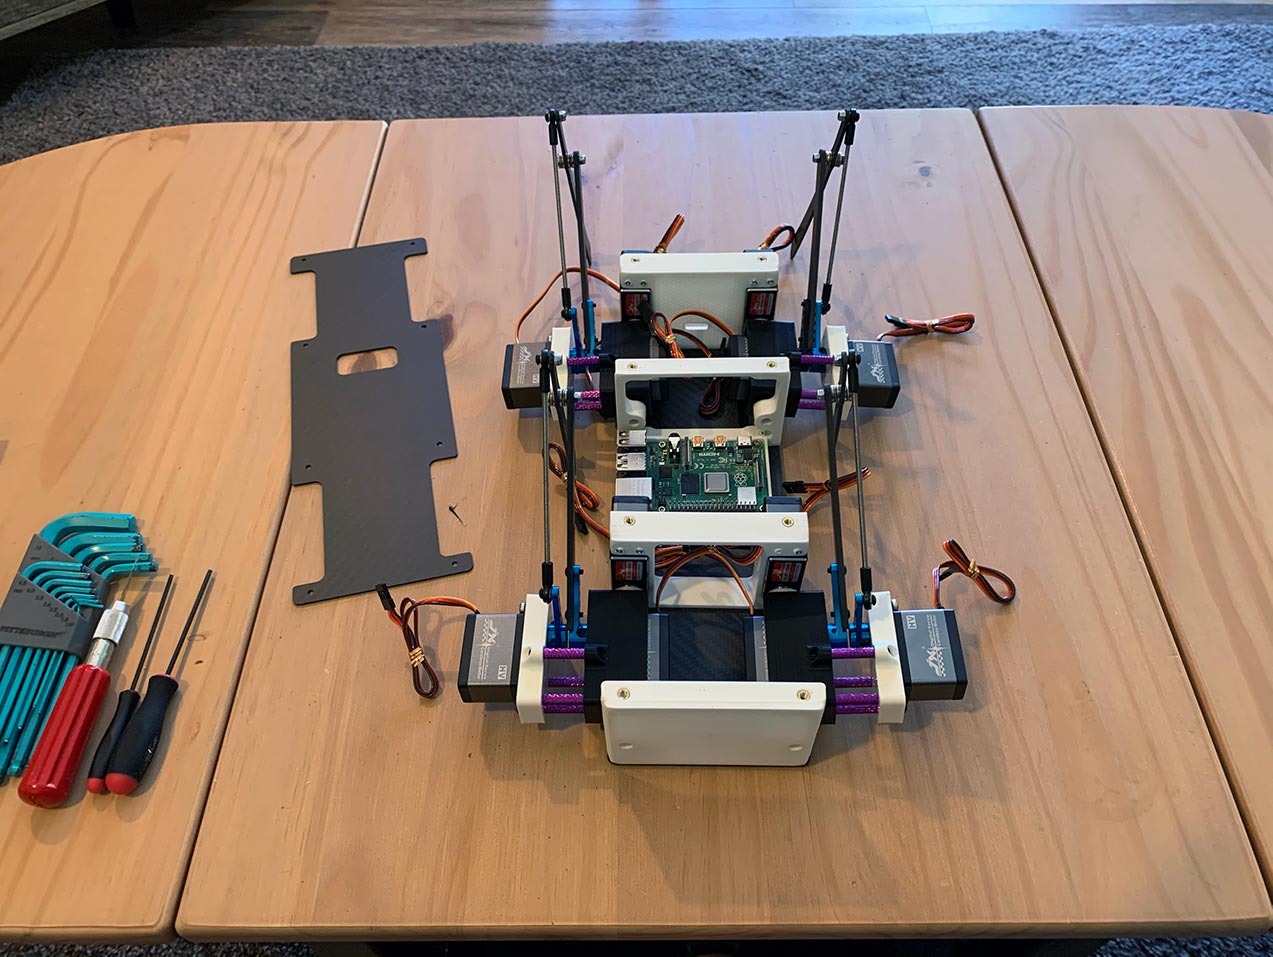
The build is documented both in text and a series of Youtube videos. The text instructions could use some rework but the Youtube videos filled in many of the missing sections. One item in particular that was not defined explicitly in the instructions I followed was the extension rod length. The Youtube video shows a process to derive the rod length in relation to the femur, but shows an inaccurate way to determine that length. If you follow those instructions you will be close to 1cm short. This causes problems later when your robot starts to walk. The value needed to be 123.5 mm from center hole to center hole. Besides that I would say plan on 6 - 10 hours to build it.
Software
The software setup has room for improvement. To start, the instructions assume a specific version of Raspbian. It appears that in multiples posts on the Google Group forum that many people attempted to use a newer OS version, but encountered issues with items like the UDP connection requirement. I personally used the latest version of Raspbian (Raspberry Pi OS (32-bit) Lite Minimal image based on Debian Buster) which only needed the udev rules for the ds4drv PS4 controller package added after all installation steps in the docs were completed.
The instructions use their own RPI-setup as a convenience for setup of wifi, ssh config, read only sd card, etc. It isn't necessary, but definitely will save you time setting it all up manually. Once you have a base SD card you execute an install shell script, which also downloads additional repos, and runs their own install shell scripts. Unfortunately, none of these repos are versioned with releases so it always pulls the master branches. Does this process work? Yes, but I can see it breaking very easily. I would rather see the project distribute its software as .deb packages, but until they separate configuration of the robot from code I think that won't be an option. This brings me to my next point.
The calibration process demonstrates the tight coupling of configuration to code. Once the servo calibration process is complete, you must modify a python source file that contains the offsets. It would be better to define the robot as configuration in something like yaml, which would allow the robot owners to make modifications. Changing the body length or leg distance should not require modifying the source code. This would then allow the project maintainers to package their code in .deb packages, thus simplifying the installation process. This would also have the added benefit of allowing new hardware support (IMU, Lidar?) to be added with only what I hope to be a single additional .deb package and a change to your robot's config.
Closing thoughts
Overall, I'm happy with the project and I have a perfectly functioning robot. The community members on the Google Group are very responsive, and the project maintainer appears to be very open to feedback and community participation. We will see where they take it in the future. I may even try my own hand at packaging these repos up for new comers.
My goal is to take this robot from simple RC to full autonomy. Camera, voice commands, better operator feedback, and maybe even a Google Coral are all in my sights. The Jetson platform is also very attractive. Stay tuned.